SIDigital Animation


EXPERIMENTATION
Visual experimentation done for the Final Major Project.
Little Kitty Test
To test the Little Kitty rig, I found a TikTok video of a cat on a window still with some very subtle movements since my idea focused on realistic movement. It is incomplete, but I wanted to start feeling comfortable with the rig. I really like the ear flick as the cat moves away, so I think I am starting to identify aspects I would be interested in exploring.
Script Revisions
Based on the feedback I recieved, it felt easier to reassess my interests and intent for the FMP project. I knew my interests were in the relationship between cat and owner, so I decided to emphasise that. In my Portfolio Unit, I explored dramatic narrative but for this project I felt as though I wanted a more fun and comedic narrative instead. I focused around daily routine and the relationship between the character and their cat, and then an event which creates a version of tension and relief with the vase. I added elements to engage with Superhero rig's props: his boombox and hoverboard.
Rough Storyboards
When we discussed the Three-Act structure, we were tasked to summarise our story in 5 to 6 sketch frames. I boarded the second half of the vase sequence. I am not particularly good at drawing, but I wanted to try to experiment with composition and expressions to at least visualise my idea. The section of crashing into the bookshelf is incomplete, but I think the staging is fairly effective.

Tutor Review
After the Story Workshop in Research, I had a discussion with my tutor about my explorations. After presenting the idea in conversation, I received very positive reception and certain areas to improve upon:
-
The story felt better than the one presented in Week One: the relationship between the owner and the cat are well established, and the characters are quite sympathetic.
-
My tutor noted the Script Draft 3 has a two separate ideas presented as one. The first half focuses on the life of the owner and the cat, whereas the second half is an event on its own.
-
I decided to focus on the story in the second half because it feels more interesting for an exaggerated animation style while the first half would focus more on realistic movement.
-
Ending was engaging, especially with the use of reversals we researched in the Story Workshop. My tutor commented there's an element still missing. I pitched the idea of the ending being where the character is hit with the book, falls forwards into the dressing table, and vase falls anyways. Cat looks exasperated at the human as the film ends.
-
-
I pitched the Agora Community "Superhero" rig, and it was recieved positively. The contrast between a colourful human to their black cat definitely creates appeal.
-
The test I did with the Kitty rig was good experimentation, but to properly test a rig it is important to use extreme poses to understand its physical boundaries. When I know how far they can both go then I can either break the rigs to fit what I need, or explore within their limitations.
Based on the feedback I recieved, we identified what would be important for me to accomplish for Week 3:
-
Since the story would focus on the second half, it means I would have to redo the beginning of the script to establish these characters in a different way, and end with an epilogue instead of abrupt cut off after the climax.
-
To develop how the characters would be staged, I should do an environment plan for the story layout.
-
Attempt a previs pass of the story. Since I am not confident with my drawing skills, instead create the story in Maya using the Superhero and Kitty rigs.
Script (2nd Draft)
When we discussed the Three-Act structure, we were tasked to summarise our story in 5 to 6 sketch frames. I boarded the second half of the vase sequence. I am not particularly good at drawing, but I wanted to try to experiment with composition and expressions to at least visualise my idea. The section of crashing into the bookshelf is incomplete, but I think the staging is fairly effective.
Scripts
I began with a first draft to visualise my idea. I wanted to have little to no dialogue and focus on the interaction between the characters. For my first draft, I wanted to show this characters life outside of his cat. So I created a montage of his life between a cafe, social media and work and how it can become overwhelming; but upon re-evaluation it seemed too ambitious with multiple locations and editing for the 12 week period. So I decided to revisit the draft so make it simpler.
I felt the second half was the main story I wanted to communicate with the idea of finding comfort and security with another in an atypical love represented, like a pet and owner. The second half also felt heavier emotionally, so I added the beginning bit to relate to the character and add in humour with falling down. My camera research from StudioBinder for Portfolio made this quite easy as a reference to communciate a "Match Cut".
Tutor Review
After collecting my research and developing my script, I showed it to my tutor for greelight and there were a few responses they had. Although not greenlit, I was encouraged to explore further with the idea to make it engaging:
-
My tutor informed me the story felt flat. There’s like a punchline missing or tension that feels missing. It felts too linear and too simple, especially as a scriptwriter. I was encouraged to explore building tension.
-
I was encouraged to re-evaluate the rigs I chose. I initially pitched Mr Buttons and Omega but my tutor felt as though the appeal of the characters didn't fit the story I was trying to convey. I alternatively pitched the Little Kitty rig and there was a positive reception to it.
-
In addition, Mr. Buttons seemed to be too similar to a cat. Having two similar characters can be dull, whereas a contrast create more appeal to an audience. They recommended a human-like character to create interest in contrast.
-
-
Berry (the cat) seemed to appear out of nowhere. It would be better to seed Berry in the beginning for the pay off in the end.
-
Instead of falling at the door, have the door shut and immediately cut to fall on the sofa. This would make the sequence far more economical in regards to time and simplicity.
-
My tutor commented that my intent for cartoony animation is used for exaggeration and comedic storytelling, whereas the dramatic story I presented would need a more realistic style with minimal movement.
-
My reference footage with TikTok videos were good, especially the reference with the cat walking across the owner in bed. My tutor encouraged me to test the Little Kitty rig.
The reason why Week Three has no progress is that I fell ill and was resting. So my progress immediately skipped to Week Four.
Tutor Review
After the UnReal Engine Workshop in Research, I spoke to another tutor to gain another perspective of the story. This conversation helped me streamline my idea and how to think about my project moving forward:
-
The ending of the story is fine, the beginning is the issue.
-
The characters of the Kitty and the Human are undefined, so there isn't as much connection to them.
-
Who is the Human? Who is the Kitty? Are they hero/sidekick? How can the audience tell quickly who they are?
-
-
-
Focus more on cat behaviours and research visual storytelling around cat behaviours.
-
The reason why Simon’s Cat and Garfield are good is because they focus on cat behaviours that are very human
-
-
Have environment feel similar to the Superhero character.
-
Characters typically have their environment match their visual colours. When you see Batman's Lair or Andy's Room (Toy Story), you can tell what type of character they belong to.
-
Visually connecting the characters to one another can create appeal with small assets, like how Scooby-Doo wears a collar to establish his identity as a character.
-
Based on the feedback I recieved, we identified what would be important for me to accomplish for Week 3:
-
Think of the relationship between the two characters. I am interested in visually exploring this connection, but I do not find interest in exploring a superhero/sidekick dynamic. Perhaps an angel/demon dynamic?
-
Design some ways to visually connect the cat to owner. e.g. A colourful collar for the Kitty.
-
Think about how the environment works for the Human character. What can the environment visually communicate about the story?
To test the Superhero rig, I recorded a reference of me experimenting with different big movements. I did a first blocking pass with most key poses and a few breakdowns with that reference. Based on Week 4 Research around Garfield and Simon's Cat, Idid more exaggerated movements of a human and I quite liked how the rig worked.
Superhero Rig Test - Blocking
Little Kitty Test - Spline
After my research into Cat / Human media, I splined the Kitty Animation test I did. I tried for subtle movements to try and contrast the exaggerated movement and expressions of the Human character. I think it is successful, but I would need a reference which has the character moving more, but still subtly.
Kitty Collar - First Pass
Based on my tutor review, I wanted to style the collar beyond a generic plain collar. So I explored with different shapes. I was interested in repeating diamond shapes extruded from the collar to give this sense of danger around the cat. After I finished modelling the first pass, I had a realisation that the diamonds would heavily weigh down the cat's neck, so scrapped it and decided to rethink the design.

Collar Developments
I spoke to my tutor about my collar experimentation, and heutor agreed the diamond polygons would not be efficient. He recommended I could do a regular band and apply UVs for interest, which I did. I took the UVs into Photoshop and made the collar design in there. Used the three colours of Superhero rig (Purple, Green, Yellow) to give visual cohesion between Kitty and Human
Layout Pass One
This week, I also did the First pass for Shots 22-27. I used After Effects to intercut the stylised Godzilla/Gamma sequence and the Superhero/Kitty sequence for the cross cut transition. Ieyframed the books flying off the side to give a quick view of how the crash is indicated, and used the wiggle transform tool in After Effects to get the crash FX.
Tutor Review
I spoke to my tutor about the Layout Pass I made for the sequence. They communicated points for improvement.
-
For Shots 25 & 26, it's effective but it can be even stronger. Instead of showing the hand grabbing Alpha/Little Kitty, instead show the hand of Godzilla/Superhero reflected in the scared eyes of Little Kitty. This would take some rendering tricks, but it could work.
-
My tutor questioned the use of Alpha rig to show how the cat sees itself. He communicated it would be more efficient to show Little Kitty across both environments for audience clarity, as the cat would see itself as a predator.
Importing Rigs to UnReal
When importing the rigs to UnReal, there was an issue with Superhero Texture because of how it was textured with MARI. The entire body was one texture (as seen on image on the right). With guidance from my tutor, I had to redo the material assignment in Maya to see how the material would be assigned. Little Kitty had it own difficulties placing textures onto itself, but it was quickly resolved. I then took my Superhero blocking animation into UnReal to test if animation was successfully imported into UnReal. It worked beautifully.

Iris Wipe Test - After Effects
Based on Research in Week 6, I did Iris wipe ending in After Effects by following tutorial with Invert and Solid Shape. Initially, I just helf on the cat, then just went to finish. But something felt off. Instead, I realised adding anticipation with the circle expanding and then finishing would add more personality to the transition at the end.

Cheating Perspective
For Shot 26, when the Human reaches out for Kitty, I wanted the hand to be big like the monster hand to match the composition of Shot 24. However the Human character cannot scale the hand independently from the body, in combination with looking good while animating. So the solution I had was using two rigs: one hidden under the environment (except for the hand) and another for the face of the human character behind it.


Developing Layout Pass 2
At this point, I wanted to get Tutor Review of story so kept working on Layout Pass for Pass 2. I managed to complete Shots 19-38 for a section of the full pass. I also did Shots 11 & 14 as tests, made it separate since remaining shots of the sequence weren't done yet and could cause confusion.
Tutor Review
I spoke to my tutor about the Previs Pass I made for the sequence.
-
He questioned why the character goes for the cat and not the vase. He was assuming the character was trying to make a choice, but it makes more logical sense for Human to go after the vase. I communicated my idea of his panic and the adrenaline for the choice.
-
As for the exposition, he suggested I introduce all three elements (Human, Cat, and Flower Vase) all at once. This would create interest as the audience would tie these three elements altogether. He suggested trying a 3 Panel comic to simplify the story to its narrative core.
-
They suggested instead of the layout all on one side, have the character be on two sides of one room. So Superhero is at the doorway, and Little Kitty is on the bookshelf (a little lower than but) besides the shelf with the vase.
-
My tutor felt it was difficult to interpret the eyes darting in Shot 19. They guessed I was trying to communicate that, but I was missing that last element. He suggested I put insert shots of the cat and the vase after each time his eyes dart to make it clear to the audience that the character is making a decision.
-
He complimented the meteor idea, and used it as an example to improve the monster hand. The first shot is of the book, then cut to the metoer, then cut to the impact. So it goes in order of: Reality > Feeling > Reality. With the Monster hand, I should show the reality of Human reaching for the cat, the cat's perspective of the monster hand, then cut back to the human.
-
My tutor also spoke of priorities and re-evaluating the story. Considering they have suggested big changes to the story, I should revise what elements I want to keep in the story and what is malleable.
I spoke to my second tutor and recieved an additional perspective of feedback.
-
Questioned the forest in Shots 24 & 25. 'Less is more', and felt as though the forest was confusing and would rather be better to maintain story. I suggested I could remove the forest and have the hand be large as it reaches for the cat, but the character attached is the Human character. I think I can get away with this through After Effects.
-
They enjoyed the character interactions with Shots 11 & 14, and felt it gave the exposition and building the relationship between them.
-
They enjoyed the reflection in the cat's eyes.
-
The questioned the exposition of the bookshelf. They wondered how the bookshelf would be seen beforehand. I was also questioning this, as it felt difficult to combine the previous three elements and the bookshelf as a fourth. This may tie in together with making the bookshelf its own obstacle.
-
They agreed with the previous tutor that interspersing the insert shot may be better.
Re-Establishing My Vision
After my review with both my tutors, I felt as though I hadn't firmly established what in my story was important for the end product as well as what I wanted to explore in this project. So using my process I did with Victoria for their collaboration project, and established non-negotiables (things I wanted to keep), the main storybeats, my thought process on the feedback I recieved, and understanding each shot's importance.
I realised the stylisation switch between the cat's vision and what was actually happening was causing confusion in the story, so I decided to scrap that switch in animation styles. That actually helped me stick to one location and clarify what I needed to establish was significantly reduced, and switched my focus to only cartoony kind of animation. So the beginning would fit slice of life narrative storytelling then switch to an action sequence in saving the cat.
I needed to provide exposition on and establish the bookshelves, the cat, the vase, and the human. These four things are key to the story so it really helped narrow my focus. I revised my script to reflect my vision fully and provide a strong basis for the story. The beginning was far more clearer than I expected, and focused the story between the two.
By doing this, I redid my Shot List (see "Project Management - Shot Management") which reduced the number of shots from 39 to 30, making my story far more efficient visually. I also modelled a toy mouse which provides the cat incentive to jump off of the dressing table. (A turnaround of the modelling asset can be seen on the right.) The model was meant to be simple and efficient, since it is not meant to be an actual mouse in the shot.
Revising Previs Pass
Since the story had certain shots I'd already done needed to be redone. So I redid the shots for Shots 26-30 with the vase in the hands of HUMAN, since the vase hits the book above them. I did this in the story because there was confusion about why the book had a stretch of time after the crash. This section of the sequence mostly stayed the same.
Since I hadn't had much progress on the beginning, I decided to start production work on this section since I gained more clarity earlier in the week. So I started with the establishing shot, and I realised the composition of the shot could be interesting for a title card placement. I tried it, and I was really happy with how it turned out. There was an issue with the far and near clip plane causing a glitching in the shot but I resolved that quickly.
Finally, I redid Shots 13-17 to showcase the inciting incident (left) and Shots 18-22 with the monster hand and saving KITTY (right).
Book Stack Rig
For Shot 3, I wanted to play with exaggeration with the stack of books. So I took some book assets from the environment and made a stack of them. I initially attempted to use skeleton joints since that's what I was familiar with in rigging, but tutor informed me it would be more efficient to use deform lattice. So with my tutor's help, I did that and it was really amazing how it turned out with the exaggeration and curves.

UnReal Engine - Retexturing Human
After the issue with Superhero in wttempted to retexture human. After Week 6 where I put it in, I decided to try assigning the material to the character.
And I got quite close! There does seem to be an Issue with the hair and the eyes, which I feel easily resolvable with some help from my tutors.
Flower Vase Asset
During my layout passes, I was using a vase asset by Hend_Z on TurboSquid, but wanted to add flowers in the sequence. I searched online and found a flower rig on TurboSquid by baqlot.
I used flower rig to have them bend properly so it looks like a bouquet then hid the controls and skeleton, then referenced into my scenes.
Complete Previs Sequence
Before this week, I had Shots 12-22 done and I wanted to present a full previs pass by the following Tuesday for our Presentations. So I developed Shots 1-11 then 23-30. By having this full previs pass done, I would be able to recieve feedback on the full story and focus on feedback regarding any issues about composition, timing or shots that could be cut out. I made sure to add reference to clarify the more subtler movements, like Shot 11 with Human gasping or Shot 9 with Human walkiing in and leaning against the door frame.
PRESENTATION
In Week 9, we were to present our development, collaboration, and scheduling for the last few weeks of the project. Below I have added both my video recording of my presentation and my actual presentation with the embeded YouTube Links.
PRESENTATION FEEDBACK
After my presentation, I recieved feedback from my tutors.
-
They liked my energy in the way I present and said I shouldn't change that.
-
They were worried it might be too much, but after seeing my scheduling and how I have managed my time, they had more confidence. Also interested in seeing the full sequence with shots they hadn't seen before which makes the sequence more efficient.
-
They recognised certain shots may make the story less taxing, so instead they suggested that if I want to streamline my work (as mentioned in my presentation) it could be that:
-
The meteor book cut out, just have Shot 27 cut back to the cat, meowing at the human, and cut to black with a THUNK SFX.
-
Making the beginning exposition/story more efficient by reducing those since they have an intensive requirement of animation.
-
-
Tutor was aware of my intent with the monster hand and my aim with it. The class felt the effect was clear, so I count that as successful.
PREVIS FEEDBACK - Marcus Ayerton
I spoke to an industry professional Marcus Ayerton, a Previs Artist at The Third Floor and an Alumini at my institution. I wanted to get an outside perspective on my Full Previs Sequence.

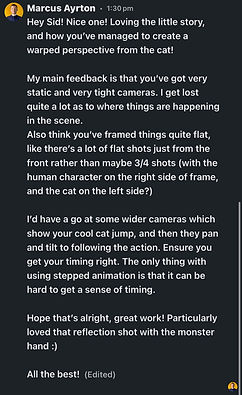
PREVIS FEEDBACK - Bring Your Own Animation, March 2024
I went to Bring Your Own Animation in London, and spoke to a various number of artists including Mason Haynes (Anim_Mason) who enjoyed my previs pass, but had concerns if I would be able to achieve the animation within the projected time. I explained my rationale for how the golden poses were there and had the major skeletal poses which just needed polishing, before moving into breakdowns and inbetweens.
I spoke to Michael Bond, a Lighting / Comp / Pipeline Technical Director at Nexus Studios, and he suggested experimenting with a crash zoom for the Monster hand to give the audience the looming feeling of the hand.
Eye Dart Test
In order to make my characters feel more alive I found videos on Eye Darts to make the expressions of characters feel less static. I did a test on Shot 13 (left) based on my general understanding of eye darts, but it felt too mechanical, so I revised through the AnimSchool and AgoraCommunity videos in Research and attempted another test (right) which would be less mechanical.
Fixing Book Texture
In my sequence, I has an issue with the book rig for Scenes 2-3 because the textures were not showing properly. I tried resetting face materials on the rig, but it didn't work and I was stuck. I spoke to my tutor on how to resolve this, and they informed me of Select Face > Set to Face. This cleaned up the books so much and made them feel colourful. They noted how the book's spine isn't modelled properly, but we understood that by messing with the geometry, it will affect the rig itself so we decided to leave it as it is.


Resolving Superhero Texture for UnReal
In my presentation I gave in Week 9, I mentioned my issue with UnReal with retexturing the Human character since the materials were messing up. As much as I tried to resolve this on my own, I knew I needed help from my tutor. I showed my tutor and we encountered a few issues. The rig was initially textured with the MARI system, so it caused a lot of issues in transferring the texture information.
-
We tried assigning new materials (blinns and standard surface) which didn't work.
-
Tried deleting the textures in Hypershader and redoing them, which didn't work.
-
The character is supposed to have six material sections in UnReal, but it had four initially. Then after our experimentation, it got reduced down to one, which caused more issues.
My tutor knew this would need to be more intensive and resolved using his expertise, so I sent him the file I had at Week 9 and texture files for him to fix and send to me. He gave an update with how the character was done which I did not understand the first ten times I read it, but it was resolved so far and I would need to experiment with it.


Next, I replaced the referenced rig with the new one in my Rig Test (see Week 4). By testing both the animation and the textures, I would be able to see the full abilities of the rig and see any visual issues that may have occured. As you can see in the video on the right, I found no issues with this updated rig. I did have to create a new transparent material for the character's cornea, but that was easily solvable and I'm excited to move forward with this!
Reworking Cameras for UnReal
At this point, I remembered the Cameras in Maya and Cameras in UnReal have two separate settings for their cameras (see "Research - Week 6"). Since I didn't set up cameras in Maya for UnReal so went to set that up. I did a full sequence pass of my blocking with the new camera settings. I recognised a few things:
-
Some shots were too wide so it made the shot feel too expansive. By changing the apeture, I was able to focus in on my characters more.
-
The books flying onscreen during the crash were out of shot, so I had to redo those.
Importing Godzilla into UnReal
As I was going through my checklist (see "Project Management") I realised I hadn't tested the Godzilla rig to see if it could even be imported to UnReal Engine. I did some key animation in Maya (its' not good, but its to check if it worked) and exporting and importing was successful.
I did have to reassign the textures via a new material, but that was relatively quick. Now I know all my rigs are functional, transportable, and can be properly textured in UnReal Engine. Now its full focus on animating the final product.

Eyeshine & Eye Reflections Tests
The last thing I had to do was the eye reflection tests for the characters in UnReal Engine. There were three key moments where characters' eyes reflected an object: Kitty with the vase, Human with Kitty, and Kitty with the Monster Hand. I had a general understanding of how to do it, but I went to confirm with my tutor first. He suggested I use specularity on the eyes to create that reflective surface, similar to the exercise we did in Week 5's workshop.
The first thing I focused on was the eyeshine of the Kitty, which created a big difference in the appeal of Kitty with the render engine. The eye shine was a separate material section so we used the opacity on the translucent material to apply the eyeshine and it turned out beautifully as seen below.


Next of importance was the specularity. I kept trying to fiddle with the specularity of the eyes, but that didn't work so I tried the specularity of the eyeshine, which also didn't work. I think the translucency of the eyeshine was making the effect not appear. My tutor informed me it would be difficult with using Cell Material, especially for the human character. When the Cell Material was off, the specularity was there and reflecting well; but with it, there was no specularity of reflection.

I spoke to my tutor about it and he reminded me that the Cell Material flattens the textures and the specularity does get lost in it. I asked him how I could get the reflective effect, and he suggested: exporting the eyes as Alembic, import to UnReal in a black background, turn off the toon shaders, and render the eyes reflections, and then composite the animation in After Effects. Since I was fairly versed in After Effects, I knew my next steps.
Falling Roses Test
For Scene 19, I had an issue that needed to be resolved. When the flower vase falls and bounces off the book, I had been animating the vase without the flowers. When I put the flower vase in, I thought that (logically) the flowers would have to fall out since they're lighter than the vase. So I animated that and wasn't sure how it would be recieved. So I asked my animation colleagues and some acquaintances who hadn't seen the film before. I got back positive reception, with some people not even noticing it. It was a risk to take this later in production, but I decided to take it!
Full Blocking Pass
By this point, I had used my references to create my full blocking pass for my FMP.
Blocking Pass - Shot 8 Golden Poses
I continued my main FMP developments with golden poses. I started with Shot 8 since that was a 'focused' shot. I think the developments on this one work well. It definitely requires a lot of polish, but it's a start.
Finalising Environment
I wanted to finalise my environment for my FMP. Since I was using the Cartoon Environment by Matt Tovar, I wanted to repurpose the environment for my story. I removed the bed, the palm trees outside (since my sequence did not need windows), and reorganised the layout of the desks with the vases.
One aspect I focused on was the bookshelf. Since the environment was referenced into each Maya scene, I created three different asset layers for multiple points of the sequence:
-
Layer 1: Pre-Crash, without second row of books. This was for the early shots in the sequence before the human throws the books on the shelves.
-
Layer 2: Pre-Crash, second row of books. This was for the shots after the books were thrown on the shelf.
-
Layer 3: Post-Crash. This was for the shots after the Kitty and the Human crash into the bookshelf, which has the books and plants disorganised to give visual and logical continuity to the audience/

Book Pile - Gravity FX Test
I wanted pile of books on the ground for Shot 20. I used the video I found in Research - Easter One to do Active Body and Passive Body FX. I initially had the books fall on the floor but they just synchronously bounced off the floor no difference, so used a Platonic Solid polygon so the books could spread apart. I didn't quite like this because it didn't form a pile in a way I wanted, so I knew I had to find and use another way.
Book Pile - Mash & Bullet FX Test
To make the book pile, I followed the Mash & Bullet tutorial I found. The original object still exists, but visibility immediately turns off so I can still reference the original object while creating multiple duplicates for a single MASH FX. The falling rotation affects all the objects simultaneously and seperately from the original object's rotation.
I wanted to form a dome shape and capturing the object in the sphere, but there was an issue so I have to resolve that. I scrubbed through the timeline and found a frame that felt good. Based on the tutorial, I duplicated and deleted some books to try and scuplt the feeling of the book pile. (Turnaround can be seen below) I know there's too many books, but I feel like the exaggeration accentuates it.
Importing Book Pile to Main Scenes
I imported the Book Pile to the relevant scenes. I did the Book Pile before focusing on animation for Scenes 18-21 because I wanted to understand how to frame the animation around the asset, since its easier for me to animate around the object than model the asset around the animation and have it feel random in its own way.
Scene 21 had an issue with the second shot where the books were covering the camera, so I had to rearrange the books to give the audience visual continuity and the original shot I had in my previs pass (see images below).

