SIDigital Animation


Research
A collection of different research work done over the course of the unit.
This section includes research into my roles and sectors, the companies I identified interest in, and some additional research into certain visual development queues for my roles.
Role / Sector Research
Research surrounding my Sector and Industry of interest and the roles I will be experimenting for the Portfolio Module. This is research surrounding my roles I am exploring for the Portfolio Module. I have included my research I did when I was exploring a Previs/Layout animator role.
3D Character Performance Animator
3D Animators take a character rig provided for the project and create the illusion of life by making the character move. Character Performance Animators specifically focus on the character’s acting and performance, as opposed to Body Mechanics Animators who focus on character body movements. For example, an actor would provide a good visual reference for a Performance Animator, whereas a martial artist would provide a good reference to a Body Mechanics Animator.
3D Performance Animators take the visual brief from storyboard artists and a verbal brief from the director to create the final shot(s) or sequence through blocking the key poses. 3D animators typically work in large numbers, so they must adhere to a similar animation style and overall look.
This role has certain requirements I must meet, such as:
-
Art. The ability to reveal attitude, emotions and mood through a character’s movement is extremely important to an animator. An animator must understand spatial awareness and movement over time.
-
An animator must have a good understanding of the animation principles and mechanics of animation.
-
Communication. The ability to understand and share creative ideas while having productive discussions and taking notes on work done.
-
Organisation. Work within schedules, and creating the animation to meet deadlines/
-
Watching Animation, in terms of having a passion for the medium and love for the industry.
3D Previs/Layout Artist
3D Layout Artists use the storyboards provided by the storyboard artists to determine the depth and perspective of what appears on the screen. 3D Layout Artists determine the lenses, camera angles and camera movements in the 3D software’s virtual environment, such as AutoDesk Maya. With communication from the director, they develop the desired style of virtual photography for the animation. Layout artists focus on blocking the key points of the character movement, timing, scale in relation to the frame and reference to the storyboards provided, and how to best tell the story. They do a rough pass of the lighting and produce the shots.
3D Previs Artists plan how certain sequences will look like, and help develop the visual look of the project. ‘Previs’ refers to ‘Previsualisation’ as it helps to determine the look of the animation project prior to creating and finalising it. Previs Animation is typically used for planning live-action or 3D action sequences: planning shots, working scale and timing in relation to character movements. The animation for these sequences and shots are not as technically polished in comparison to a 3D Performance Animator since this is an attempt to visualise character movement and action. This helps many live-action and animated projects save valuable time and money on set or in post-production.
Since 3D Previs Artists and 3D Layout Artists work on timing, cameras, and the overall visual look of the final product, they are often considered one role. They both work together with directors and storyboard artists to get the overall look and visual storytelling key points of the project. They do exist as two separate roles on their own, but it is common to tie them together.
These roles have certain requirements I must meet, such as:
-
Understanding and having an eye for camera composition and cinematography
-
Understanding lighting techniques, know how to use them to affects emotions and knowing how to tell a story through a shot.
-
Communication skills to work within a team and understand and help the director’s vision.
-
Layout artists will work with storyboard artists, the directors, art directors and animators.
-
Previs artists work with layout technical directors (TDs), the directors and the VFX supervisor.
-
-
Animation and appropriate 3D software. Have a high level of skill for 3D animation software, along with a strong understanding of form and volume.
-
Watching Animation. Interest in the medium, industry, and for film and tv.
-
Being creative in the story you tell, with original ideas for what the shots could look like and inspiring the director’s imagination (Previs specific)
-
Have basic editing skills, as well as some knowledge of rendering and compositing which can be used to create 3D animatics (Previs specific)
-
Organisation skills, sticking to production schedules and helping achieve directors’ vision.
Scriptwriter for Animation
For the purposes of this unit, I will be researching and developing my scripting projects independently. I find it relevant to mention my role as a Scriptwriter here due to it being a role I will be pursuing.
Animated films and a majority of animated television use scripts to develop narratives and story ideas. These scripts are sent to storyboard artists and directors to create and test various styles before deciding the final visual look of the project. Some projects utilise board-driven writing, this is fairly common with Cartoon Network shows and projects. Board-driven narratives are where storyboard artists are given an outline of the story; whereby they write and board the episode. For the purposes of my role, I am focusing on Script-driven narratives.
Writers can create original stories, develop stories based on existing IP, or commissioned by companies or studios who have an idea to be developed. A writer comes up with a story, develops an outline, and writes a full script (including dialogue and action) in the format of a screenplay. Animation writers must be more descriptive in their final script than a live action writer, since the board artists and directors require information on how the character performance must be delivered.
This role has certain requirements I must meet, such as:
-
Ability to write and to know how to communicate emotions, characters and action, writing well and innovatively
-
Knowledge of animation screenplays, and how to improve, amend and format screenplays when necessary
-
Communication and collaboration with producer(s), director(s), share ideas, and be able to work independently
-
Watching animation for the medium, understanding the industry, and writing for potentially different styles ad possibilities within narrative
-
As a freelancer, finding opportunities for yourself, managing finances, and having the ability to motivate oneself
-
Professionalism. Being receptive to feedback, making changes effectively, and working to an agreed upon schedule.
Company Research
This is research surrounding companies I have an interest in relevant to my role as a 3D Character Performance Animator. I have included my research into companies I did when I was exploring a Previs/Layout animator role. I found five companies of interest, and the Third Floor for research into the Previs/Layout role.
Triggerfish Animation Studios
SHOWREEL

Fig. 2.1.1 Kizazi Moto: Generation Fire "Herderboy"

Fig. 2.1.2 Kizazi Moto: Generation Fire "Stardust"

Fig. 2.1.3 Star Wars: Visions "Aau's Song"

Fig. 2.1.4 Supa Team 4
Location: Long House, Dreyersdal Farm Rd, Cape Town, 7945, South Africa
Studio of Interest: Galway Technology Centre, Mervue Business Park, Wellpark RD, Galway, Ireland
Phone Number: +27 21 713 4008
Email: hello@triggerfish.com
Target Audience: Global Audience, to spread African stories across the world
Pipeline: 3D Animation Pipeline with Maya
-
AutoDesk Shotgun / ShotGrid (for deadlines)
-
Maya for Animation, Modelling, etc.
-
Maya and Arnold renderer for lighting
Job Requirements - Character Animator (all levels):
-
Software knowledge to include: Maya
-
Translate storyboards, animatics, and concept art into compelling expressive character animations that align with the project’s narrative and visual styles
-
Create realistic and dynamic character movements, including body mechanics, facial expressions, and gestures.
-
Apply principles of timing, weight, and anticipation to create animations that evoke emotion, enhance storytelling, and engage the audience
-
Collaborate with rigging team to ensure that character rigs are optimised for animation and capable of achieving a broad range of movements
-
Strong artistic skills and excellent attention to detail
-
Iterate and refine animations based on feedback from the animation director, creative leads, and technical teams to achieve desired level of quality
-
Must have the ability to problem solve to meet deadlines and work under pressure with a tight schedule
-
Comfortable working amongst a team of up to 40 people
What are they looking for in a Showreel?
-
Minimal music and editing
-
Unique and entertaining content
-
2 minutes (maximum) of quality work
How does this relate to my role(s)?
Triggerfish explores a variety of 3D stylised movement for feature films, family television, and episodic content which I have an interest in.
How will it aid my third year?
This inspires me to test a variety of different animation styles between stylised and cartoony animation, relevant to my role.
DNEG Animation
SHOWREEL

Fig. 2.2.1 Nimona (2023)

Fig. 2.2.2 Entergalatic (2022)

Fig. 2.2.3 Ron's Gone Wrong (2021)

Fig. 2.2.4 DNEG's Animation Pipeline
Location/Studio of Interest: 160 Great Portland St, London W1W 5QA
Phone Number: +44 207 268 5000
Email: careers@dneg.com / info@dneg.com
Target Audience: Wide Audience
Pipeline: Layout Pass, scaling polygons to character rigs. Environment Asset in parallel with Animation
Workflow: Layout, Reference, Blocking, Splining
Employees/Potential Contact: Festivus 2023 & Entergalatic Crew
Job Requirements - Layout Artist:
-
VFX/CG industry experience within a feature film environment.
-
Experience in sequence and shot composition.
-
Good working knowledge of cinematography in a virtual environment.
-
Excellent understanding of practical cameras and camera techniques.
-
Experience with previs animation and cameras.
-
Thorough understanding of post-production pipelines.
-
Broad 3D generalist experience, comfortable with matchmove, asset build and lighting.
-
A good working knowledge of Maya.
-
Good creative and technical problem solving skills.
What are they looking for in a Showreel?
-
Best pieces first and last
-
Short quality vs. long middling (5 great pieces for consistency)
-
Role-relevant work only
-
Software used (e.g. Maya, After Effects, etc.)
-
Personality in art
-
Two dialogue pieces, a weightlifting with emotional character performance work like sadness or joy, and a body mechanic piece.
-
Look for a piece with character that isn’t moving a lot. The character can move, but it should be impactful.
-
Shouldn’t have zaniness, like Hotel Transylvania. Just focus on the character.
How does this relate to my role(s)?
DNEG experiments with composition while translating these styled movement into 3D, which I am interested in exploring both for my roles.
How will it aid my third year?
This company’s staging and composition intrigue me in how they translate this in their layout and previs passes, which might help me as a reference.
Mikros Animation
SHOWREEL
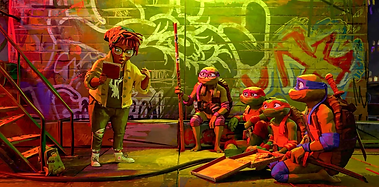
Fig. 2.3.1 Teenage Mutant Ninja Turtles: Mutant Mayhem (2023)

Fig. 2.3.2 Spongebob Squarepants: Sponge on the Run (2020)

Fig. 2.3.3 Orion and the Dark (2024)
Location: 8-10 rue du Rebard, 75004 Paris, France
Studio of Interest: 119, Wardour Street, London, W1F 0NL, United Kingdom
Phone Number: +44 207 494 8376
Email: hello_london@mikrosanimation.com
Target Audience: Global Audiences
Pipeline: Maya, UnReal Engine, and Blender
Workflow: Animatic, Stepped, Spline
Job Requirements - Role Relevant:
-
Unable to find Job requirements for roles across multiple platforms
-
Mikros’ LinkedIn
-
Mikros Career page
-
Glassdoor
-
-
I kept a close eye on their LinkedIn and Career pages, but I didn't find any specific requirements for animation roles.
What are they looking for in a Showreel?
-
Unable to find information on roles across multiple platforms
-
Mikros’ LinkedIn
-
Mikros Career page
-
Glassdoor
-
-
I kept a close eye on their LinkedIn and Career pages, but I didn't find any specific requirements for animation roles.
How does this relate to my role(s)?
Mikros experiments with exaggerated cartoony performance and stylised animation, both character performance animation styles I have an interest in.
How will it aid my third year?
This company utilises exaggeration in different ways through stylised or cartoony animation, which I am interested in exploring in my third year.
Locksmith Animation
Pipeline DEMO

Fig. 2.4.1 Ron's Gone Wrong (2021)
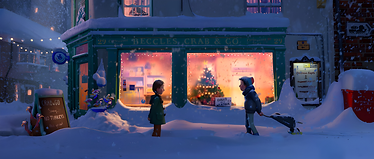
Fig. 2.4.2 That Christmas (2024)
Location/Studio of Interest: 113 Regent’s Park Road, London NW1 8UR
Phone Number: +44 207 637 6780
Email: info@locksmithanimation.com
Target Audience: Children/Families Globally
Pipeline: 3D Animation Pipeline with Maya
-
Sequence Level - Storyboarding, Previs, Animation, Effects, Lighting
Workflow: Animatic, Pre-Vis, Blocking, Splining
Job Requirements - Layout Artist:
-
Experience with Layout or Previs role
-
Comprehensive knowledge of Maya
-
Familiarity with pipeline issues and debugging
-
Ability to demonstrate a strong emphasis on visual storytelling, including composition and staging
-
Knowledge of cameras, lenses and cinematography
What are they looking for in a Showreel?
-
High level animated work
-
Personality, speaking on a personal level
-
Artists with original styles
-
Confidence in 3D animation styles
How does this relate to my role(s) and how will it aid my third year?
Locksmith explores 3D stylised movement for feature films which I have an interest in.
Jellyfish Pictures Animation
SHOWREEL

Fig. 2.5.1 Spirit Untamed (2021)

Fig. 2.5.2 The Twits (2025)

Fig. 2.5.3 Dennis & Gnasher: Unleashed! (2017-2021)
Location/Studio of Interest: 86-88 Valentia Place, London SW9 8EP
Phone Number: +44 207 580 8154
Email: pr@jellyfishpictures.co.uk / recruitment@jellyfishpictures.co.uk
Target Audience: Worldwide Audiences
Pipeline: 3D Animation Pipeline with Maya
Workflow: Storyboard, Animatic, Blocking Pass, Spline/Polish, Lighting/Render
Job Requirements - Feature Animator (Animation):
-
Extensive knowledge of Maya
-
Knowledge of timing, posing, acting and storytelling techniques
-
Strong understanding of body mechanics, anatomy, perspective and composition
-
Experience working on feature and/or episodic productions
-
Organisation and attention to detail/accuracy
-
Ability to deliver on schedule, work calmly and efficiently under pressure
-
Proactive approach - continuously finding ways to improve processes for ease and efficiency
-
Willingness to take direction and receive constructive feedback
Employees/Potential Contact: Archie Donato & Chrissy Metge
How does this relate to my role(s)?
Jellyfish Pictures Animation do production work for both TV and Film, both of which I have identified as my sectors.
How will it aid my third year?
This company’s 3D stylised movement for TV and Film are sector-relevant work I am interested in.
The Third Floor Inc. [Role Research]
PREVIS REEL

Fig. 2.6.1 Wonder Woman (2017)

Fig. 2.6.2 Spider-Man: Homecoming (2017)

Fig. 2.6.3 Hawkeye (2021)
Location: 33 Foley Street, London W1W 7TL
Phone Number: +44 204 511 0370
Email: london@thethirdfloorinc.com
Target Audience: 3D CG VFX Previs for Directors
Pipeline: Autodesk Maya, Adobe After Effects, Autodesk Motion Builder (a plus), PFTrack (a plus)
Employees/Potential Contacts: Marcus Ayrton
Job Requirements - Previs: Shot Creator/Animator:
-
Create sequences of shots from storyboards and/or script pages to enhance story
-
Possess a strong sense of composition, color, and animation timing.
-
Establish character blocking, camera positioning and animate camera movement.
-
Create realistic and compelling character animation following the 12 principles of animation.
-
Animate creatures, props, and vehicles.
-
Understand cinematic language, camera terminology and have the ability to use motion blur, depth of field and other effects, to create realism.
-
Clean up and accentuate mocap animation.
-
Possess an artistic eye for detail and understand the technical specifications for each project.
-
Maintain high consistent standard of quality and speed.
-
Understand shot continuity of sequence to help guide shot creation.
-
Work well on a team and successfully take direction from a supervisor.
-
Adapt quickly and accept change – often have to toss out ideas and start fresh.
-
Work well on a team and successfully take direction from a supervisor.
-
Adapt quickly and accept change – often have to toss out ideas and start fresh.
How does this relate to my role(s) and aid my third year?
While I am not interested in working for The Third Floor as a company due to their previs style not reflective of my role, I am interested in their processes since their workflow and pipeline is heavily previs based which provides for a great basis for understanding my role as a previs artist for my third year.
Development Research
This is research on animation knowledge I have gained based upon my roles I have an interest in relevant to my role as a 3D Character Performance Animator. I have included my research I did when I was exploring a Previs/Layout animator role, which I did not explore further after concluding the role.
During my development into 3D Character Performance Animation, I found a fair amount of resources that informed me of general facts surrounding the role.
I first found this video from AnimSchool which provided a good reference for understanding and developing workflows, the advantages of stepped vs. spline animation workflows and mixing them together in different stages of the workflow, and understanding Pose to Pose and Straight Ahead animation methods and how it affects the final animation's quality during and after the workflow.
Although the AnimSchool video was engaging, I wanted to understand more about workflows from a visual perspective, so I found a video from Sir Wade Neistadt which showcases a variety of different workflows by using Maya as an example. One workflow method that interests me which I haven't explored yet is using layered animation approach. I've mostly been working with Pose to Pose workflows.
Animation Styles
I decided to also research more into the visual style of animation I am looking for, by finding examples and understanding what interests me about them. The purpose of this research is to identify styles and levels of animation I find similar to what I want to accomplish within my role. Generally, I have identified interest in cartoony and stylised animation.
The first piece of animation was this short film Darrell (2016), which has a lot of stylised animation I am very interested in. I enjoy how Darrell is very humanoid and the situation is very human as well, but the little quirks of his amphibian design: the extension of his tongue, camouflaging with the environments, and how the flies (as his snack) add a level of complexity to the story as the flies move about the environment while being very large and round.
Another film is DreamWorks & Netflix's Orion and the Dark, set to release in February 2024. I had this trailer as an example in my "Company Research" since the animation is outsourced to Mikros Animation. Orion and the Dark interests me because the characters are made of simplified shapes and not as complex as CG characters. The characters eyes are close together, basically touching and are each
approximately the same size as the character's nose. This style of animation interests me because of the appeal of the characters' design and how the shapes complement and exaggerate one another.
I did also find a TV show, which interested me in its 3D style and that was Netflix's City of Ghosts (2021) by Elizabeth Ito. The show combines a variety of media: stopmotion, 3D, 2D rotoscoped backgrounds and live action media (like posters) to give a sense of community. The characters are 3D with 2D eyes and eyebrows, which gives a very unique sense of facial expression.
Animation Principles
One recurring aspect of my Company Research is that companies want to be able to see an understanding of animation principles. I have done these before during my Animation Fundamentals Unit in Year 1, but it is important to revisit and relearn techniques: especially those I have not directly visited in a while. For this research, I studied through The Illusion of Life by Disney Animators Frank Thomas and Ollie Johnston for the 12 Principles, as well as AngryAnimator's post on the revised and now 21 Principles of Animation.
12 Principles of Animation (Illusion of Life)
To convey volume, a drawing must maintain its original volume even if it has been squashed & stretched. This principle applies to several aspects: the cheeks of a character naturally Squash & Stretch when speaking or doing actions like chomping. Squash & Stretch is currently a mark of “Cartoon Physics” and the more Squash & Stretch present, the more Exaggerated and “cartoony” it is.
Before a character does an action, the audience must be visually aware of the action they are going to do. “The visual movement can be as small as a change in expression or as big as the broadest physical action.” (Thomas & Johnston, 52-53) This visual cue is known as Anticipation, and typically is in the opposite direction of the action to exemplify the movement.
Following the anticipation is the most exaggerated pose of the action, which makes the action very clear. AngryAnimator references this as Overshoot, where the character’s action is made very clear in a scene.
Once the character has reached their Overshoot, they come to a rest: either in the same pose before their Anticipation or a new pose related to their action. This ending pose after the action is known as Settle. This is necessary to inform the audience the action has ended, and translates to another action.
In an animation, a character uses their body to express a story: from the mood they bring, to the gestures they make with clear meaning. Or even objects in a room can tell so much about a character: is it dirty? Is it clean? How many beds are there?
How the story unfolds through camera choices and devices: Should a low angle camera be used with a wide shot to show the character’s power and might? What about an extreme close up for the mischief in a character’s eyes? It all depends how the animator chooses the Staging of it all. How is it framed on the screen? What emotions are expressed? How do the characters react to the story? And how can that be translated on camera?
“With Pose to Pose there is clarity and strength. In Straight Ahead Action, there is spontaneity.”
– Thomas, F. & Johnston, O., pp. 58
These are the two of the main ways to animate. Straight Ahead refers to animating each frame as you go, typically without a storyboard. Since animation is just “one frame to the next,” this would be an approach where the artist has creative freedom to create their animations. Pose to Pose is creating the Key Frames, and then filling in the Breakdowns and Inbetweens. This approach is widely used for proper planning and specific poses and actions.
A character has certain physical attachments on their body which follow their movements: body parts, clothing, accessories, hair, etc. These movements are involuntary, but move dependent on the Primary Action and their rate of movement is different for each object, this is known as Overlapping Action. These objects move dependent of the character, but they do not stop when the character stops, which is Follow Through.
As an example, a person runs away, wearing a scarf. The scarf moving with the character is Overlapping Action, but the scarf Follows Through the projected path, even if the character stops.
When an object is in motion, the action is fairly quick while the Anticipation and Settle slow down the movement. The object begins its action slowly, accelerates, and then decelerates. This is known as Slow In & Slow Out. This is achieved through several breakdowns and inbetweens towards the end of the action, and fewer frames during the action.
As an example, a bouncing ball would Slow In when it bounces up, accelerate when it is in the air, and it would Slow Out when it would hit the ground. It would have a few frames when it would be up in the air, but that action is relatively quick compared to the initial bounces.
Movement in life barely moves in a mechanically straight line. Typically, life moves in Arcs, a clean round movement. This principle changes mechanical “up and down” walk animations to more dynamic movement, and for any visualized movement should be in the shape of clean Arcs.
When an asset moves (typically a character) which is the main focus of an action, their movement is referred to as Primary Action, as the character or asset is moving to parts of their body. A character doesn’t just do one action alone, but the dominant action they do is their Primary Action, while other actions they may intentionally do simultaneously are known as Secondary Action.
This is often confused with Overlap and Follow Through. As an example, a character twirling in a dance would be the Primary Action, while a close up of them smiling would be the Secondary Action. Overlapping Action and Follow Through refer to other objects on the character, e.g. jewellery, scarves, etc.
Timing is the amount of time the animation takes on screen, while the space between each key frame and/or breakdown is known as Spacing. Timing and Spacing are important because of how they convey movement in time. If an animation isn’t spaced properly, then the movements in the sequence could go very fast, very slow, or both. Easing refers to the transition between frames in a logical way: making Inbetweens to make the Timing and Spacing more convincing.
When a character is in a simple pose or doing an action, you can increase the humour or increase the impact of the action by using Exaggeration. This is known in the modern day as ‘Cartoon Physics,’ where extreme cases of exaggeration don’t “replicate” live action, but capture the essence of life. Exaggeration does not mean illogical movement, as they must satisfy basic physical expectations: movements must be in arc, have a centre of gravity, and no glitches caught by the eye.
People in life replicate unique poses giving life, depth and volume. Drawings which do not provide a unique pose imitating life do not provide a believable character. They must be a Solid Drawing or have a Strong Design. The small details which mimic life: the slight grin, loose hair, their open hand extended. They tell a story of the character from their design and drawing: the shadow under their shoes, their eyes in perspective, and more. The characters are not overly complicated, but rather made up of simple shapes for the audience to have an easier time taking in.
A character becomes interesting visually when there is a type of charm about them: a fish who has a cute round face, a little boy made of wood, or an anti-hero with a villainous swagger. Appeal refers to the visual charm of the character: it makes them interesting to watch and engage with due to their simple shapes and ideas presented.
Appeal is very similar to live action's version of casting characters. The character's design has to suit the narrative told. A cute, pastel bouncing ball would definitely appeal to a general audience, but wouldn't suit an adult dystopian cyberpunk environment.
Additional Principles of Animation (Angry Animator)
Here, I present the additional principles of Animation as identified by AngryAnimator's post to add more clarity to additional principles that, while important, are not as core to the process of technical animation as the original twelve from the Illusion of Life. This is not a means to overwrite Johnston and Thomas, but to utilise their core principles and additional ones to reflect modern day animated storytelling.
When seeing a character’s actions, their body language must be clear in what emotions they are translating. Even without their facial expressions, their Acting performance must be clear to the audience. This was extremely prominent in the Silent Era of film, and animation shares these necessary similarities with slapstick physical comedy or Pantomime.
When animating, several frames are necessary. The main frames which we see in animatics and storyboards depicting the major poses and movements in a sequence are Key Frames. In the middle of each, we have Breakdowns which add a pose to fill in the gap and to define the movement. To make the animation smoother and more dynamic in their movements, more frames need to be added. These frames are known as Inbetweeens.
When creating an animation, typically Planning of the sequence and it’s visual cues are required to properly understand how the story will play out. Using rough sketches of the key frames (also known as Thumbnails) you can visually plan how the story will play out.
A Silhouette is a character’s outline. If all their details were in black and you could only see their shadow, would you be able to recognise them? This principle of animation is necessary for memorable characters. If you see the character, you should be able to recognise them from their Silhouette alone. You can tell who Spongebob is from his shadow, or other characters like Buggs Bunny or Tom & Jerry. It expresses their emotional and physical expressions. It requires an expert understanding of positive and negative spaces.
If you draw a line through a character’s pose, it is rarely ever a straight line. Typically, characters and people mimic certain curves: the shape of C, shape of S, and their reverse. This line conveying their pose is known as Line of Action. Certain times the characters are in a specific pose, and flipped to the reverse of their pose. These reversing of certain line of actions between keys are known as Reversals. A superhero may be crouching in an S-curve, hiding from a villain, when they’re punched and thrown back in a reverse C-curve.
Visual balance is extremely important for an audience to understand movement. To maintain balance within a movement, the character moves one direction and moves in the other way. This Opposing Action is done to exemplify the movement and for them to maintain balance. An example would be a character jumping: they move down in anticipation, before the jump upwards.
Counter Pose is when a character’s shoulders and hips are in opposite directions to create balance in motion. When a character has their left hip and right shoulder raised, but their right hip and left shoulder lowered, it creates an interesting dynamic as the height levels of each are flipped.
Characters and people express their emotions and body language naturally, and they are further exemplified in their movements. Characters will lead with a certain part of their body when in movement to express their emotion and tell more about their physicality. A character with their chest exaggeratedly puffed out in the direction they are walking: their chest is Leading Action in the way of the movement.
“A broken joint is an extreme example of a leading action. [...] The result is a sensation of loose-ness (but just for a moment…)”
– AngryAnimator
To give a character a loose motion in an action, there may be frames where the character is Breaking Joints. It is clear to tell if the character has broken joints if the pose isn’t able to be replicated by a human, as they would be incredibly injured.
For my Previs Role, I decided to research different ways a camera can be utilised and to educate myself on the various levels of equipment. For my Research, I used StudioBinder and "Setting Up Your Shots" book by Jeremy Vineyard.
Establishing Shot
An Establishing Shot is a Wide Shot of the environment around the subject in a scene. They are extremely important in the introduction of any scene, and don’t typically feature the subject.
They are used to open a scene or a film: wide enough to establish the geography, time of day, the subjects’ scale in relation to their environment, and inform the audience of a transition between scenes. It is common in science fiction or fantasy films, where the film has to introduce unfamiliar worlds and environments to the audience.
Extreme Wide Shot (EWS)
An Extreme Wide Shot (EWS), otherwise known as Extreme Long Shot, establishes the camera extremely far from the subject: it is an even greater distance than a Wide Shot.
The subject appears on frame, but it isn’t important to see them in their entirety. It is important as an Establishing Shot to both the location and / or the subject in relation to their surroundings. They are used to make your subject seem distant and unfamiliar. They are typically used in disaster films where the catastrophe is highlighted by the characters seeming small and powerless.
Wide Shot (WS)
A Wide Shot (WS) positions the subjects far from the camera to establish their distance from each other and in their location. It is used to see the subject and their actions, but still appear small in the frame. It can be used to make subjects appear lost, lonely, or overwhelmed. It can be used to make statements on a relationship between subjects.
Full Shot (FS)
A Full Shot (FS) is when a subject’s entire body is captured on the edges of the frames.
The top of a subject’s head to toe must be captured in the frame of this one shot. The subject does not need to be in the centre of the frame, but it is a very common staging for this shot. The Full Shot is used to express a narrative of the subject in regards to their body, posture, and wardrobe while simultaneously clearly showing their face.
Medium Full Shot (MFS)
A Medium Full Shot (MFS), alternatively known as a Cowboy Shot (because of the height of cowboys’ holsters), is when a subject’s top of their head to below waist is captured. Although widely used in Western cowboy films, it is typically used when a character must appear dangerous, confident or confrontational. Significantly when weapons (especially those typically used in cowboy films, like guns or pistols) are used.
(Note: A subject should not be cut off at the knees, since it feels atypical and “unnatural” for a subject to be viewed in that manner.)
Medium Shot (MS)
A Medium Shot (MS) is when a subject is viewed from above their head to any point which is above the waist and below their chest. It is the most popular shot in all of media, since it expresses neutrality and provides no additional commentary other shots may have. It captures a subject in a size humans typically view other people, and allows for viewing the subject's facial expressions (and eyes) while maintaining vision of their environment.
Medium Close Up (MCU)
A Medium Close Up (MCU) Shot is when a subject is framed from midchest to above their head. This Shot Size is used to centralise focus on the subject’s expression and facial details. In a shot, the viewer becomes intimate with the subject without losing the character’s physicality or any additional details in the scene necessary for their reaction.
Close Up (CU)
A Close Up (CU) Shot is when a subject is framed from below their chin to above their head. It is used to highlight a visual change of emotion or dramatic beat on screen, to visualise the character’s thoughts and feelings. They are most commonly angled at Eye Level, to capture the subject’s eyes and their emotion within. It is effective within moments of drama, anxiety, or decision making.
Extreme Close Up (ECU)
An Extreme Close Up (ECU) Shot frames an isolated part of the subject for emphasis: their ears, nose, mouth, knuckles, etc. It is considered to be the most intimate, dramatic, and potentially startling of all. The most common part of a subject seen in Extreme Close Ups are the eyes. This differs from a camera framing on a small object, which is known as an Insert Shot, an ECU Shot is specifically for characters and their framing.
Single Shot
A Single Shot features one character alone in the frame, and they are the primary focus. This framing can work with any Shot Size. A Clean Single means one character and no other parts of another character are visible on screen, which conveys the character’s isolation. A Dirty Single means one character is the focus, but parts of another character are visible in the frame.
Two-Shot
A Two-Shot features two characters in the frame. For a shot to count as a Two-Shot, the two characters’ faces must be visible on the screen for the duration of the shot. This Shot is used to establish a visual relationship between two characters: affectionate, contentious, or even imaginary. A Clean Two-Shot means two characters and no other parts of another character are visible on screen, which conveys the characters’ relationship. A Dirty Two-Shot means two characters are the focus, but parts of another character are visible in the frame.
Three-Shot
A Three-Shot features three characters in the frame. For a shot to count as a Three-Shot, the three characters’ faces must be visible on the screen for the duration of the shot. This Shot is used to establish a visual relationship between three characters: affectionate, contentious, or even imaginary. A Clean Three-Shot means three characters and no other parts of another character are visible on screen, which conveys the characters’ relationship. A Dirty Three-Shot means three characters are the focus, but parts of another character are visible in the frame.
Four-Shot
A Four-Shot features four characters in the frame. For a shot to count as a Four-Shot, the four characters’ faces must be visible on the screen for the duration of the shot. This Shot is used to establish a visual relationship between four characters: affectionate, contentious, or even imaginary.
Five-Shot
A Five-Shot features five characters in the frame. For a shot to count as a Five-Shot, the five characters’ faces must be visible on the screen for the duration of the shot. This Shot is used to establish a visual relationship between five characters: affectionate, contentious, or even imaginary.
Crowd Shot
A Crowd Shot features a large group of people in a frame. There is technically no limit to the number of characters (n-Shot where n > 5) but for simplicity, a large number of people in a shot can be generalised to a Crowd Shot.
Over the Shoulder (OTS) Shot
An Over the Shoulder (OTS) Shot is when the camera views characters over the shoulder of another.
It is a combination of a Single Shot and a Two-Shot. OTS is used for conversations between characters, which therefore focuses on only one character at a time in a shot within a scene. The audience gets perspectives of the other character from each character’s perspective, and feel included in the scene.
Point of View (POV) Shot
A Point of View (POV) Shot is when the camera is capturing what a character’s vision would, to fully be in their “point of view”. A POV Shot can be used in many instances, but is most commonly used when a character is viewing with an external aid: a camera for a found footage narrative, viewing through a telescope or binoculars; or when a character is unaware of a being watching them: a killer, spirits, sharks, etc. A POV Shot is typically paired with POV audio, where the audience hears what the characters would hear. This invests the audience and allows them to take in the perspective of the current situation.
Insert Shot
An Insert Shot is when the subject of the camera is a prop, typically one smaller in size relative to the character.
The framing of the Insert Shot can be made intriguing based on the previous framings mentioned. Such examples include: a POV Shot, 3rd Person Perspective or both.
Low Angle (LA)
A Low Angle (LA) is when the camera’s location is below the subject’s eyeline, looking up at them. They are typically used to make a subject more powerful. The angle can be subtle or extreme. It is often paired with the High Angle to show two imbalanced sides of power in a scene.
High Angle (HA)
A High Angle (LA) is when the camera’s location is above the subject’s eyeline, looking down on them. They are typically used to diminish a character, making them look weak or vulnerable. The angle can be subtle or extreme.
An alternative version of the High Angle is the “Aerial Shot”, which is where the camera follows the subject from high in the air. Although typically found in chase sequences, it is most commonly used to establish environments: cities, landscapes, characters moving in a larger world, etc.
Overhead
An Overhead (alternatively known as “Bird’s Eye View” or “God’s Eye View”) Shot is when the camera is 90O angle above the subject, directly above them and looking straight down at them.
This angle works well for showing complex movement, a connection to a divine collection, or capturing the details of a crime scene.
Dutch Angle
A Dutch Angle is when the camera is rotated on its side axis and tilts the frame.
Typically used in moments of great emotion with the subject (at times) presented as imbalanced or not in their right state of mind: it can create a sense of uneasiness, mania, terror, ot bewilderment. It is used to magnify tension in a scene: the further the angle of the tilt, the greater the tension in the scene.
Eye Level
An Eye Level Shot is when the camera is translated to the eye-level of the subject.
It is very commonly used as it is the most typical way people interact with one another. It does not add any additional information on its own, but it is used to empathise with the character.
Shoulder Level
A Shoulder Level is when the camera is translated to the shoulder level of the subject.
It gives the illusion of a low angle shot, without the connotations presented. It is the second most used camera angle after the Eye-Level shot. They are typically used in conversations between characters, and can at times be framed as an Over the Shoulder shot. They can emphasise a height difference and communicate a power difference.
Hip Level
A Hip Level is when the camera is translated to the hip level of the subject.
This angle is found in every genre, but conventionally appears in Western Cowboy films alongside the Cowboy shot size. This is due to gun holsters placed at hip level.
Knee Level
A Knee Level is when the camera is translated to the level of the subject’s knees.
It is typically used to track a character through an environment, or showcase character details missed in a Wide Shot. These shots often double as Low Angle shots.
Ground Level
A Ground Level is when the camera is translated to the level of the ground below the subject, or even slightly below the ground. It can also be on the level of the subject’s ankles.
It can be used to track a character’s movements through a scene in a stylish manner, or to capture an environment’s details. If the camera tilts upwards, it can double as a Low Angle shot.
Deep Focus
Deep Focus allows the audience to see the characters and surroundings clearly.
It allows the audience to focus on both the main story which the camera is highlighting, and the details or elements around them. It allows them to view the details at their own pace. Deep Focus allows for viewing layered action: the ability to see action in all lengths of distance.
Shallow Focus
Shallow Focus renders one specific element in focus, and the rest out of focus. This element can be in the background, foreground, or both. The “Bouquet Effect” can occur, where out of focus lights form a blurred hexagon type of shape.
It is used to guide the audience’s attention to a specific element, and only that element. This can make the effect romantic, add meaning to an asset, isolation, or a character’s emotional state.
Soft Focus
Soft Focus has no element in the frame completely in focus.
It was previously used in Noir films to make their female characters appear softer, and heighten their beauty. Soft Focus isn’t typically used, but can often be seen in dream sequences or flashbacks.
Rack Focus
A Rack Focus shot provides a change in the depth of Shallow Focus within a shot: changing from one subject to another in the same shot. It also allows for revealing new elements in a shot without cutting.
Split Diopter
A Split Diopter shot has two elements on opposite sides of the screen each have their own shallow focus. It allows for viewing elements in the foreground and background without using Deep Focus.
This is used when you have two characters at different focal distances, but want them to have their own Shallow Focus. This is very uncommon in usage, since it utilises both Deep Focus and Shallow Focus simultaneously, which is atypical for human vision to see in day to day life.
Tilt Shift / Swing Shift
Tilt Shift (or Swing Shift) allows for a very narrow portion of the centre frame to be in sharp focus, while the rest is blurred. It is used to give an effect of miniature sizes when doing a crowd shot, or if a character has a blurred vision and can only see a narrow amount, use Tilt Shift.
Handheld
Handheld Shots use Shoulder Rigs, which is when the camera is placed over the Operator’s Shoulder, or an Easy Rig and the camera is held in the Operator’s hands. This Camera Shot is used to capture a shaky effect. This is commonly used to heighten the intensity of a scene, establish intimacy between two or more characters, or both.
Tripod
Tripods (alternatively known as “Sticks”) Shots are when a camera is placed on a three-legged support system. The Tripod is excellent for capturing static shots or shots with movement, if movement is necessary. It is used when attempting to visually focus on the subjects within the frame without any attempt at compositional distraction which include: dialogue scenes, emotional single shots or shots which require attention to blocking and staging. A “Fluid Head” Tripod allows for the camera to smoothly Pan left and right, or Tilt up and down.
Pedestal
Pedestals are mechanisms which move vertically to capture a scene.
The Pedestal is used for capturing small vertical movements, such as that of an actor, establishing the world, building suspense, or revealing new information.
Crane & Jib
“Cranes” & “Jibs” each place the camera on the end, and use arms to extend outwards to Push In or retract inwards to Pull Out. They also Pan left and right in addition to Tilt Up or Tilt Down.
“Cranes” and “Jibs” are terms used interchangeably for the same movement, but of different sizes. A Jib captures larger movement than the Pedestal for larger heights, but the Crane carries even greater distances, especially with large scale environments. It can be used to capture an emotion of a shot, or to follow characters through a very large environment for Establishing Shots.
Overhead
Overhead Rigs lock the camera onto a beam above the subject. It is typically used as a substitute for “Cranes” or “Jibs” where the location or budget does not allow for it. This Gear is used to translate details in Insert Shots to the audience, Point of View shots or Overhead Shots. It also communicates the idea of the omniscient.
Dolly
Dolly Rigs lock the camera onto a wheeled apparatus placed on tracks placed to capture the specific movements. These tracks can be straight or curved.
This Gear is mainly used to capture movement and precision. More specifically, smooth movement of Push In, Pull Out, or Trucking. The Dolly is very important to achieving specific effects like the Dolly Zoom.
A disadvantage to Dolly Rigs are their weight and operational effort, as they will require more than two people to operate. An alternative are Camera Sliders, which achieve the same effect as a Dolly, but on a much smaller scale; or, to cover long distances (such as a car’s movement) a Cable Cam is used, where the Camera is locked onto a Rig sliding down a cable at specific speeds.
Stabiliser
Stabiliser Rigs lock the camera onto a rig (bodily attached to the operator) with counter weights (such as in a Steady Cam) or motorised gimbals (which rely on battery power) to compensate for unwanted camera shake.
It is ideal for long takes, moving organically through large sets, or complex tracking shots.
This Gear moves more organically with the movement and blockings of the actors than a Dolly Rig which is limited by being locked onto tracks. It allows cameras to move steadily along terrains, like the Dolly Rig, and allows the operator to move freely in any direction.
Snorricam
Snorricam (commonly referred to as “Chest Cam,” “Body Cam,” or “Body Mount”) is a device that rigs the camera to the body of an actor. This Gear creates a subjective and dynamic camera movement dependent on the actor’s movements. It can create imbalance, vertigo (similar to the Dolly Zoom), dizziness, panic, or sympathy with a character’s point of view.
Vehicle Mount
Vehicle Mounts lock the camera onto a fixed point on a vehicle: cars, bikes, helicopters, etc. This Gear is used instead of a far less accurate operator following the vehicle’s movements with the camera.
This Gear aids in capturing the intensity of a vehicle’s movements for the narrative.
Drone
A Drone is a camera locked into a box which is attached to propellers which allow for the camera to fly in the sky remotely. This Gear is most effectively used to capture aerial shots and (grand) establishing shots, typically found in chase scenes and Extreme Wide Shots. This effect was previously achieved using helicopters.
Motion Control
Motion Control Gears are cameras locked onto a crane which moves to accomplish several composition and layouts. It allows for precision in control of all camera movements, and exact repetition of camera movements for additional shots.
Although this Gear is commonly used for visual effects, it is used to capture time lapse shots, and remains as an industry standard for stop motion animation.
Underwater Housing
Underwater Housing is a protective case allowing for control of the camera when fully submerged underwater.
This Gear makes shots more immersive, anxious, or intimate than with an alternative camera. It is effectively used for immersive shots where characters are floating and the audience feels as though they are floating with the characters as the frame partially is covered by water.
Static
A Static shot is when the camera does not move at all. It is usually locked in place, and allows the audience to focus on the shot itself. It is effectively used for dialogue, composition, or to focus on an actor’s performance. It can also be used to trap the audience with the character.
Pan
A Pan shot is when the camera rotates horizontally, but stays fixed in one position. It is typically used to follow Character’s action, or to reveal new information to the audience and/or the characters. The energy of the Pan also conveys to the audience: a slow pan builds anticipation.
Whip Pan
A Whip Pan is a quick Pan. It heightens the energy of a Pan shot. It is commonly used when translating high energy narrative: a combative nature between multiple sides, developing a relationship, etc.
Tilt
A Tilt is when the camera rotates vertically, but stays fixed in one place. It can be used to give a character prominence or showcase their vulnerability. It can also reveal information: a character, a setting, or scale.
Push In
A Push In is when a camera is translated forwards to the subject. It is typically used to showcase an important element to the story: dialogue, a prop, or even text. It can be used to showcase a character’s thought process, or specifically an internal conflict.
Pull Out
A Pull Out is when a camera is translated backwards away from the subject. It is typically used to deemphasize the subject, as they grow smaller, and have the audience disconnect from the characters or scene in general. It can be used to unveil context, setting or characters in a scene. It can be used to emphasise negative emotions like isolation or abandonment.
Zoom
Zoom changes the focal length of a camera’s lens without translating any movement to the camera itself. You can Zoom In (lower the focal length) or Zoom Out (increase the focal length). Similar to Pull Out, it can be used to unveil context. You can Zoom In to direct attention to one specific element, or a slow Zoom to craft uneasiness and tension. This movement has no human equivalent, so this move seems unnatural at times.
Crash Zoom
Crash Zoom is when the camera Zooms quickly and “crashes” into their final focal length. They can be used for comedic effect, dramatic effect, or both. It is typically used in montage shots when a character is preparing.
Dolly Zoom
A Dolly Zoom combines Dolly movement with Zoom to create the “Vertigo Effect”. There are two ways to achieve a Dolly Zoom, and each has their own effect: positive or negative psychologically.
The Camera can Dolly In and Zoom Out. This allows for the background to become larger while maintaining the scale of the foreground. It is used to show internal or external conflict.
The Camera can Dolly Out and Zoom In. This allows for the foreground to dominate the scene as the background reduces in scale. It can be used to place the background into the scene.
Camera Roll
A Camera Roll rotates the Camera on its sides’ axis, while maintaining the lens’ direction.
A Camera Roll disortients the audience and upsets their equilibrium. It can also affect a character’s movement in moments of panic or conflict. It can make the audience unsettled, or reiterate themes.
Tracking
A Tracking shot moves the camera through a scene, typically following a subject. They differ from Push In and Pull Out: they don’t move to or from the subject, but rather with.
This movement is typically used when characters are on the move, and the audience is following them to their goal. It raises two questions: “Where is the character going?” and “What will happen when they get there?” They can be used to build tension in a scene where the audience is anticipating the characters’ destination.
Trucking
A Trucking shot moves the camera sideways, while maintaining focus on the subjects.
Similar to the Trucking shot, this movement is typically used when characters are on the move, and the audience is following them to their goal. It raises two questions: “Where is the character going?” and “What will happen when they get there?” They can be used to build tension in a scene where the audience is anticipating the characters’ destination.
Arc
An Arc shot orbits the camera around the subject. The arc shot is typically horizontal, but can also be vertical.
This movement is typically used for creating energy in a scene while the characters are standing still. It keeps the audience’s focus on the subjects for a variety of reasons: intimacy, panic, or heroism. It can also add tension to a scene where characters stand still and engage in intense conversation.
An arc shot is typically steady and slow, but when sped up it creates a dizzying effect: perhaps to reflect a character’s mental state.
Boom
The Boom movement moves the Camera vertically: up or down.
This movement’s use is dependent on its speed. Small Boom movements are typically used to reveal information, while Large Boom movements are used to follow characters in action. Both can also be used to reveal the world around a character, or reveal a character themselves, such as an antagonist.
Random Movement / Camera Shake
Random Movement / Camera Shake moves the camera with its focus on the subject, but with no specifically planned movement to the camera.
Camera Shake is added to capture a subjective view of the experience for a more intimate effect. These movements (combined randomly with the previous movements) can be used to create a documentary look, or the impression that these events are happening in real time. It can also be used to contrast character: the planned movements to represent calm, and the Random Movements to represent chaos and intense emotions.
Fade
A Fade is when the ending of one shot gradually transitions to a solid colour (typically black or white) and from the solid colour into another shot.
Fade (from black) is the easiest way to start a sequence, as it visually and slowly introduces the audience to the environment and characters. A Fade (to black) at the end is used for closure of the story being told, or allow the audience a moment to breathe after an intense sequence.The Fade (to black) can be used as a stylistic choice within a single scene; cutting in and out to specific clips for dramatic or heightened effect. This is known as “Dip to Black”.
Fade (to white) is used for when characters are switching to or from a dream sequence, or dying. A Fade (to white) can also be used for ambiguous ending; leaving the audience on an ending but not giving the answer to the narrative in that sequence.
Dissolve
A Dissolve slowly transitions from one shot to another, unlike the Fade which transitions to and from a solid colour. Its main use is to showcase a long passage of time cuts between the same scene (more than the Fade), to signal a character’s memories, or a dream.
A technique used with the Dissolve is “Superimposition.” In film, this refers to when two shots are present on screen at the same time. This is often used to show a dream sequence or a character’s memories.
Match Cut
A Match Cut transitions between two scenes with similar elements: shapes, compositions, colours, movement, or sound. It connects the two shots immediately. Match Cutting between facial expressions means the story is cutting between one character at two points in their lives. You can combine the Match Cut with a Dissolve to create a “Match Dissolve”. It accomplishes all the purposes of the Match Cut, but loses its abruptness.
Iris
An Iris is a transition of a circle zooming in on an element in a shot to a solid colour, and/or zooming out from a solid colour onto an element of a shot. In a previous era of filmmaking, it was a manual effect made by closing a camera’s iris or aperture, used similar to a fade to open or close a film. Although uncommon now, it is especially effective for sequences that require a vintage essence.
The zoom in Iris is used in a shot to concentrate on a specific emotion or idea to end the scene. A zoom out Iris is used to introduce new aspects around the element highlighted on or for emotional resonance.
Wipe
A Wipe is when the second shot replaces the first by replacing it from one side of the frame to another or using a special shape. Wipes can go up to down, right to left, diagonally, centre to the frame’s edged, respectively vice versa for each example, and more. It can transition using shapes: stars, flip, clock, etc.
It is especially effective for sequences that require a vintage essence. Unlike the Iris however, it is quite commonly used ironically in modern media for comedic purposes.
Passing
The Passing transition (or the Pass By Effect) has a moving character or object move across the scene to transition from one scene to another. This can also be done where the camera itself moves by the object to transition from one scene to another. It is generally used as a way to hide the transition, and carry forward the momentum from the previous scene.
Whip Pan
The Whip Pan (or Swish Pan) is a quick horizontal pan rotation which blurs the cut between different locations in a scene, or different scenes altogether. It keeps the momentum and energy from the previous scene to the next. It has a lot more energy in its transition than the Match Cut, and therefore is used successfully when character’s experience the world in a faster pace than the typical speed.
Smash Cut
Smash Cuts transition similar to a Match Cut, but the energy of the visuals and audio in those two scenes contrast with one another. A Match Cut between a restful picnic under the sun, to a person screaming in agony inside a disgusting train station. This cut is used to shock the audience: it is primarily seen in character’s awaking from a dream, or for comedic effect.
J-Cut / L-Cut
The J-Cut and L-Cut are audio-based transitions. The J-Cut is when the audio of the second scene begins before the first scene ends. The L-Cut continuously plays the audio of the first scene into the next. These transitions are called J-Cut and L-Cut respectively because of how they appear in the timeline of an editing software. The position of each audio overlapping the prior (in the case of L-Cut) or following (in the case of J-Cut) scene.
The J-Cut is used to transition to the past of the character: hearing the scene before we see it, so the audience prepares for a new location. The L-Cut is used for narration: adding new context to the continued audio with cutting to new scenes simultaneously. This creates a new, complicated, nuanced meaning.
Aspects Ratios refer to the size of the film/sequence/scene/shot in terms of its width and height on the audience’s screen. The aspect ratio is important to the genre of the film. A common rule is in reference of what to capture: if there is horizontal discovery and information, such as wide scale environments or vehicular focus, then a wider aspect ratio will be suitable. If there is a lot more vertical discovery, such as high skyscrapers or a visual relationship with the sky, then a taller aspect ratio may be suitable.

2.35:1 (Anamorphic Widescreen)
This Aspect Ratio is one of the most popular cinematic aspect ratios alongside 1.85:1. It is very wide and very common in westerns, grand adventures and historical epics.
It is very effective when framing subjects as horizontally large: wide landscapes, worlds breathtakingly unfamiliar to the audience, etc. This aspect ratio is chosen for a variety of reasons. Since the screen is so wide, Close Ups on characters allow for a collective look at the landscapes around and behind them. Typically, the natural setting of the story plays a big part in the film’s overall narrative, like epics, adventures, and dynamic landscapes. This aspect ratio is different from how we as humans view the world, so this aspect ratio is typically popular with fiction and fantasy films where the audience is meant to suspend their disbelief appropriately for their genre.
1.85:1 (Standard Widescreen)
This Aspect Ratio is one of the most popular cinematic aspect ratios alongside 2.35:1. It is a slightly narrower aspect ratio in comparison to the 2.35:1, but it is also taller in comparison. Although very popular in dramas and comedies, it can exist in a wide range of film genres.
It is very effective when framing subjects as vertically large: tall buildings, dinosaurs, imposing figures. This aspect ratio is chosen for a variety of reasons. First, they allow for wide shots without the audience feeling too far away from the characters. Since the screen is so much larger, Close Ups on characters feel more intimate and focused with little to no background distractions. This aspect ratio is typically how we as humans view other people, so this aspect ratio is typically popular with non-fiction, dramas and comedy films where the audience is meant to be grounded in the narrative and ideas presented.
Wide Shot (WS)
A Wide Shot (WS) positions the subjects far from the camera to establish their distance from each other and in their location. It is used to see the subject and their actions, but still appear small in the frame. It can be used to make subjects appear lost, lonely, or overwhelmed. It can be used to make statements on a relationship between subjects.
How Does a Lens Work?
Light passes through the lens and into different and multiple glass shapes known as “Lens Elements”: slightly bend (refract) the light which then lands on a point (known as the Focal Point) on an Image Sensor. An Image Sensor is where an image is created.
Each Lens is separated by its Focal Length (mm) which is the distance between the Optical Centre (the centre of the lens) to the Image Sensor). The smaller the Focal Length, the closer the lens can capture and the wider the angle of view. The larger the Focal Length, the further the camera can capture, but the narrower the angle of view.
Prime Lenses have their Focal Lengths fixed, while Zoom Lenses can alter the Focal Lengths by adjusting lens elements.
For this reason, Prime Lenses have a low number of lens elements, which allows Prime Lenses to capture sharper images. The large apertures also let in more light for low light scenes, i.e. scenes under candlelight. Prime Lenses allows for capturing shallower depths of focus to isolate the characters.
Zoom Lenses allows for filmmakers to change their Shot Sizes without changing their lens, which saves valuable time.
The first four lenses will speak about their aperture and ability to capture, while the last two will be a further dive into the lenses focusing abilities.
Extreme Wide Angle / Fisheye (18mm to 24mm)
Extreme Wide Angle Lenses can capture closeups and landscapes within the same shot. Fisheye Lenses work the same as Extreme Wide Angle Lenses, but have some visual distortion.
Due to this atypical visual distortion, this is used in shots where the audience is invested in the scene but suspend their disbelief for certain actions occurring on the scene. In a Close Up Shot, the Fisheye lens exaggerated facial features and distorts them.
Wide Angle (24mm to 35mm)
Wide Angle Lenses provide a wide angle view without the Fisheye’s distortion.
Wide Angle Lenses are successful in immersing the audience, and at times create a stylised look. They accentuate and highlight movement within large, cluttered spaces; in tight spaces, they can create distance between two characters close in Local Space, while still making the audience present in their story.
Standard (35mm to 50mm)
Standard Lenses provide a shot which is identical to visuals we as humans see in our daily life.
The Standard Lens are ideal for grounding your audience and presenting a shot in a more typical viewing. It allows the audience to feel immersed in a scene as though they are viewing the characters in real time with their own eyes.
Telephoto (70mm & Up)
Telephoto Lenses are used to capture subjects at a large distance.
This Lens is used to make the audience feel as though they are viewing the subject from afar, and compress the space of all distances whether they are backgrounds, foregrounds, or midground. They are commonly found in spy films, mysteries or isolating a character amongst a crowd.
Macro
Macro Lenses are used to capture extreme close up shots in sharp detail. Although they do not fall into a specific focal length like the above four, they do have a wide range of Focal Lengths. These are separated by having “MACRO” specified on the camera.
The Macro Lens is typically used for capturing objects in Insert Shots in clear and sharp detail for the audience to be able to understand its importance, as seen in detective, thriller or mystery films. It can also be used for capturing animals who may not be suitable to follow closely: out of danger, frightening them, or terrain.
There are two things to consider when choosing Macro Lenses: Magnification Ratio and the Minimum Focusing Distance.
Magnification Ratio is defined by “Size of Subject in the Shot” to “Size of the Subject in Real Life.” Macro Lenses have Magnification Ratios of 1:1 (the size of the subject in the shot is the same as in real life) and 5:1 (the size of the object is five times larger than in real life).
Minimum Focusing Distance refers to the distance the camera should be to the subject to have them remain in focus. Longer focal lengths may be required for capturing subjects which scare off easily, like insects. If able to capture subjects up close, a shorter focal length may suit the shot.
Tilt Shift
Tilt Shift Lenses are used to intentionally keep the subjects out of focus, even tilting the shot whether its up, down, left, or right to distort the scene.
Tilt Shift shots make the subjects seem much smaller than their actual size intentionally, in order to make them seem like pieces or toys. In another way, they create a blur to create a dream-like effect for a more vintage and stylised look.
Additionally, I did research into films and television I enjoy, and what was interesting about the CG action sequences. I found the directors of the Films/TV shows and their editors to see how they collaborate for timing, camera cuts, and cinematography for visual storytelling.
Directors: Troy Quane and Nick Bruno
-
Specifically liked their directing abilities on the Netflix film Nimona (2023), animated by DNEG (see "Company Research").
-
Troy Quane was a storyboard artist on several films prior to Spies in Disguise (2019) and Nimona (2023): Enchanted (2007), 9 (2009), Hotel Transylvania (2012), etc.
-
Nick Bruno worked as a 3D animator on several Blue Skys films prior to Spies in Disguise and Niona: Rio (2011), Epic (2013), and several Ice Age properties.
-
In Nimona’s action sequences, they reveal information and convey shape shifting in a really easy to understand manner.
-
Editor: Randy Trager and Erin Crackel
-
While they did some edit additional feature films separately, they both edited Spies in Disguise and Nimona. This means they have a direct correlation and causation with Troy Quane and Nick Bruno’s final product.
-
Directors: Pacal Cherrue and Arnaud Delord
-
I mostly like their work from Netflix and League of Legends' Arcane (2023).
-
There’s a sequence in the final episode of Arcane (“The Monster You Created”) that builds suspension. It uses darkness and light in really interesting ways. It’s an 11-minute sequence (which I call “The Tea Party”) where characters are entering into the sequence to add nuance and complexity to characters. The sequence takes place in one environment and slowly goes from one character to four. The way it is revealed is fascinating and something I am intrigued by,
-
-
Editor: Roberto Fernandez
-
On IMDB, he doesn’t have any credits for editing excluding five episodes of Arcane. Specifically interested in him because he edited the finale.
-
Other assistant editors were discussed, but he was the main editor credited in the episode.
-
Directors: Kyler Spears and Jeff Rowe
-
Co-directed the recent Teenage Mutant Ninja Turtles: Mutant Mayhem movie, mostly animated by Mikros Animation (See “Company Research”)
-
Kyler Spear also worked on several Amphibia (2019-2022) episodes which I really liked. The Season 1 and 2 Finales “Reunion” and “True Colors”. He also did “Hop ‘Til You Drop” (302A) which has some really fun action.
-
Jeff Rowe also co-directed Mitchells vs. the Machines (2021), separate from Kyler Spear.
-
I like how they convey action while keeping characters’ personality traits. (For Mutant Mayhem example, see the video below. This review was not done by me, but sponsored by Agora.community)
-
Editor: Greg Levitan
-
Main editor for Teenage Mutant Ninja Turtles: Mutant Mayhem (2023) and Mitchell’s vs. the Machines (2021)
-
Previously worked as an animatic editor on Star vs. the Forces of Evil, Adventure Time, and Regular Show.
-
During the Portfolio Unit, I took part in several workshops from my tutor experimenting with Look Development such as lighting, texturing, stylisation, etc. I have included the tutorials I followed from my tutor below, and arranged them in order of the workshops.
Geo_Override_Sets
-
Learning how to smooth with Subdiv in a Room Set & Toy Train
-
Learning how to have low polygon in viewport, but smoothed in Arnold Renderview


Shoes_GEO
-
Introduction to Three Point Lighting using Shoes (Fill Light, Sun/Directional Light, Rim Light)
- Using PBR textures with Hypershader (Base Colour, Height, Metalness, Normal and Roughness)
- Using Photoshop (with Layer > Autocontrast) to develop the interior of the shoes by overlaying Ambient Oclussion and Beauty passes


Weird_Robot_VFX
-
Smoothing and preparing a model for Adobe 3D Substance Painter and exporting to obj. export file
-
Importing, baking maps, & texturing in 3D Substance Painter using masks, generators and materials
-
Returning to Maya, setting up Substance Painter plugin, and setting up Arnold shaders & lighting (HDR & images)
-
Render passes & compositing in Photoshop (AO, background, & light wraps)
Substance Painter

Ambient Occlussion

Applying Textures in Hypdershader in Maya
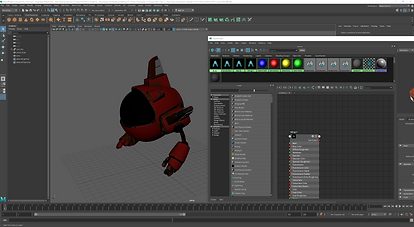
Beauty Pass

Final Comp
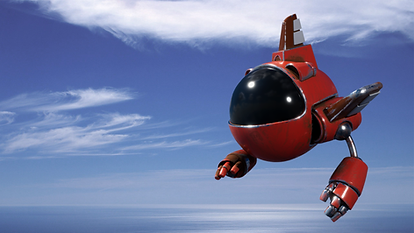
Cute_Games_Robot
-
Robot challenge to see if we can apply our knowledge from the Weird_Robot_VFX
-
Understanding high and low models in Substance Painter
-
Using a low poly mesh and using Substance Painter to create textures for the illusion of high poly
-
-
Lighting a textured and rigged asset using HDR lights
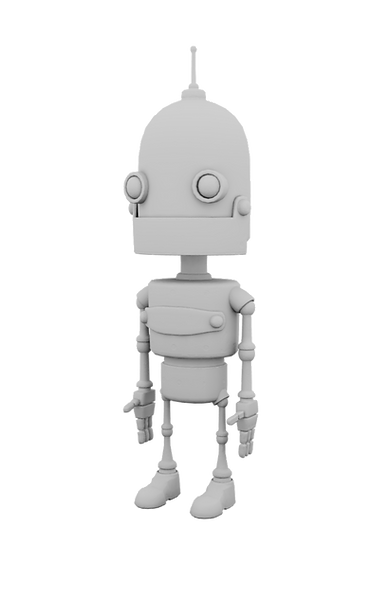

Ambient Occlusion (low poly)
Beauty (High Poly Texture)
CreatureModelling_Games
-
Additional challenge for high poly creature for AAA Games
-
Applying textures in Substance Painter to an organic character
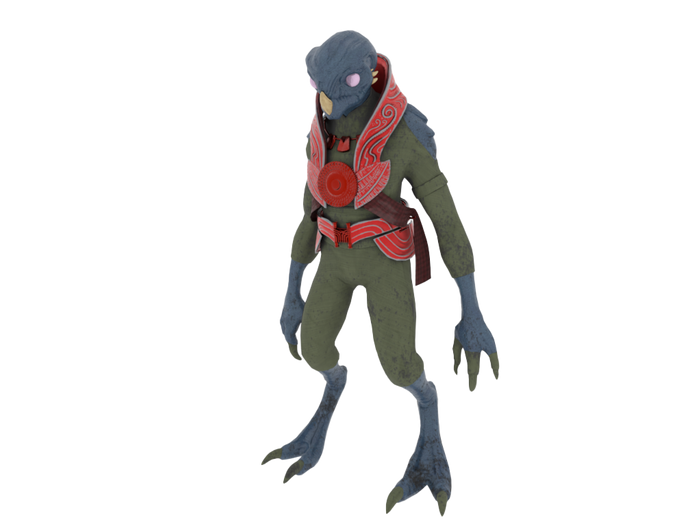

Look Development and 3D Stylisation
Waitress Rig
-
Learned about 3D Shaders, textures, Sub-Surface Scattering & skin with Arnold Renderer and Hypershader
-
Sub-Surface Scattering is about making the character look less like a plastic doll and more alive, with blood underneath the surface of the skin
-
Main emphasis of difference is visible on the fingertips, the way the nose is glowing, and the blush on the characters cheeks being excentuated.
-
-
The character was textured in a Phong material, so I redid all the objects back to AiStandardSurface
Pre-Workshop

Post-Workshop

Toon Shaders (Waitress Rig)
-
Learned about Ai Toon Shaders to make objects render to look more toon-like
-
Using Ramp on Tonemapping to give that toon-like shader
-
Personally really like this sort of character style, so might experiment with this.
Pre-Workshop
Post-Workshop

Look Development and 3D Stylisation
Three Point Lighting Recap (SimpleBot)
-
Recapped Ai Skydome and Directional Light to make a generic lighting set up
- Experimented with more interesting lighting (using colour) and metalness on AiStandardSurface
- Experimented with HDR maps reflecting on the metalness of the character
- Focused on making renders more economical (removing volume and subsurface scattering)
Pre-Workshop

HDR (Metalness)

HDR (Less Metalness)

Digital Sets: Gnomon_House
-
Used Sky Gradients JPEG as a reference to replicate sky colour and mood lighting in Maya using Arnold
- Introduced to colour temperature settings in Maya
- Used Ramp for Lighting Colour for Sky Dome colour
- Using a directional light to counterbalance Sky Dome Colour (and adjusting Sky Dome ramp where necessary)
- Attempting various lighting passes in order to test the feeling of the sequence
- Using exposure on lighting to achieve a balance between the Sky Dome and counterbalance directional light
- Cleaning noise using Render Settings and Imager Denoiser
- Making characters stand out in a well lit environment (demanding audience's attention)
- Altering asset's textures to help with a shot's look (making background colour properties less saturated)
- Increasing colour exposure level on character's textures
- Using a rim light to accentuate the character
- Using Angles properties on Directional light to blur shadows for the dusk look
- Altering colours in Ramp effect for the dusk look
- Using additional lights to make character stand out during Dusk lighting (Rim & Kicker)
- Romantic Lighting with purples and pinks to provide a coloured lighting option
- Cheating lighting to make the scene feel natural and logically natural
Midday

Early Morning / Romantic Lighting

Sunset / Dusk
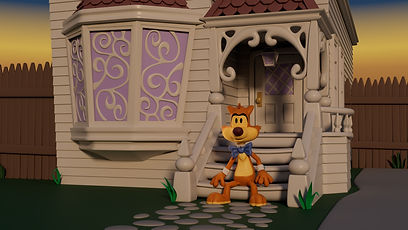
Night Time

Sam
-
Using ramp for effects on non-textured characters (viewport only)
-
Use fake spot lights,
-
Change background colour in Maya,
-
Transparency Ramps to create a fake spotlight effect,
-
Anti-aliasing & AO,
-
Lights & shadows (Ray Trace Shadows); and
-
Create a dark outline on the character for a stylistic final product.
-
-
I really like this stylised colour effect. I might explore that for my FMP and future projects.
Asset Provided

Post-Exercise

Snail
-
Blend nodes for switching colours / textures & Asset nodes for publishing controls
KNOWING WHAT YOU NEED
GOBOS & GEL
-
It's about knowing what you need AND what you don't need to make a location feel believable and alive. It is different from what you want to do.
-
How to do more theatrical and dramatic light using the previous workshops and exercises.
CARD SETS
-
Understanding how to make characters fit within a world via exposure of textures
-
The importance of Global Illumination (grass creating a green illumination on characters) through Diffuse in Render Settings
-
Segue into UnReal Engine which has trivialised it
-
It is an important render tool in Maya, but it requires more than thrice the amount of time without it.
-
It does look good, but if time is a constraint, you're likely not going to use it.
-
You can cheat global illuminsation by using a Ramp on a Sky Dome for a similar effect, but Diffuse in Render Settings is more accurate to that feeling.
-
-
It's about priorities!
-

ArmRenderStart
-
Batch Rendering (Image Sequence) in Maya & Arnold with a Arm_Grab animation
-
Smear Frames using asset duplicates
-
Using Motion Blur in Maya and altering render setting to define arcs and readability in an animation